MGA - Master Gann Analyzer
User's guide
v.3
Main Menu
Menu "File".
The ōFileö menu entries support all sorts of operations on files and active window (active chart). You can view several charts simultaneously, but your personal settings (layout, analysis tools, functions) can only be updated in the active chart (to enable fast work).
1. Open...
This menu hase same sub - menu:
1.1.Open... ASCII file
To create a chart, select the corresponding menu item or click  on the button bar; you can also use the keyboard shortcut ½Ctrl-O╗.
A standard Windows file open dialog box will be launched.
on the button bar; you can also use the keyboard shortcut ½Ctrl-O╗.
A standard Windows file open dialog box will be launched.
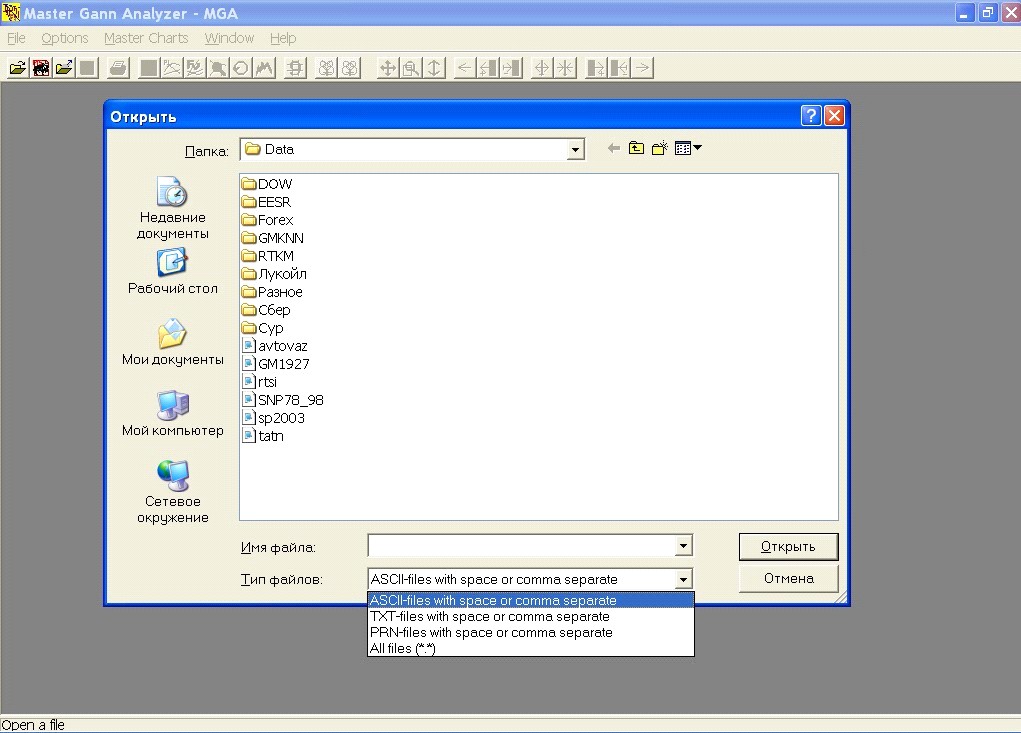
The default directory is the one where the MGA files have been installed. If for some reason the menu doesnÆt open edit the MGA.ini file the way you like it.
In the ōFile typeö combobox choose the preferred data file format or any file format (All files *.*). Double click on the selected file or press the ōOpenö button.
The system will then start loading the data from the selected file and a progress-bar will appear on the status bar.
When all the data from the file are loaded into the program the " Tunes of opening data" dialog box will be launched:
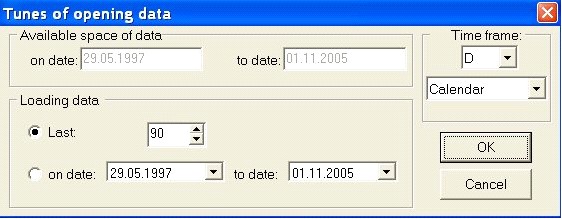
The ½Available space of data╗ group will show you the maximum range of the historical price data.
The ½Loading data group enables you to set the time period on viewable a chart (you can change this setting afterwards to view a larger / smaller data range).
Checking the "Last " option and entering / changing the number in the corresponding field will allow you to seen only the latest ōNö bars (the default value is 90).
If you select the ½on data ¢ to data ╗, (since ... to ... ) all the data from the chosen time period will be viewable on the chart. The default value is to the maximum time period of the loaded data.
The ½Time frame╗ group enables you to set the time frame of the chart. You may change these parameters of the chart any time ¢ doble click left mouse button on X-Axis.
The ōTime frameö combobox allows you to choose the periodicity of the chart: D ¢ daily, W ¢ weekly, M ¢ monthly, Q - quarterly or Y ¢ yearly data.
The next combobox ōCalendar/Tradeö allows you to choose calendar or trading data will be drawing on the chart.
Having set all the chart opening parameters press ōOKö to switch to the chart window.
Pushing the ½Cancel╗ button will undo all changes in the chart opening settings and will load the data file with default settings (i.e. the whole time period will be viewable on the chart).
1.2. Open... Metastock file.
To open a new chart select this menu entry or click the  button on the toolbar; you can also use the ōCtrl+Mö keyboard shortcut. You will then see the following window:
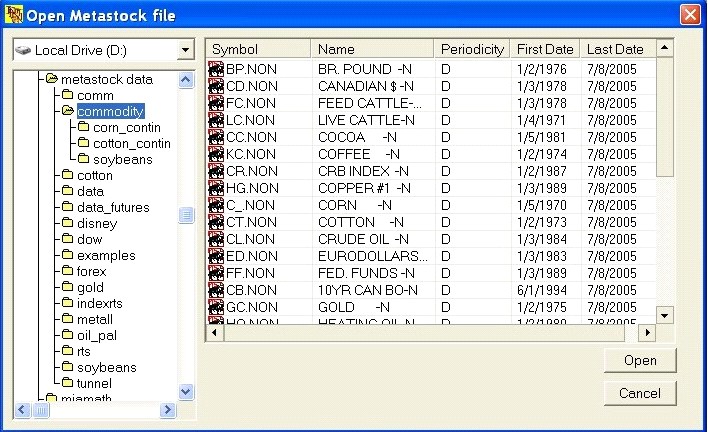
The default directory is that of your recent work (the program ōremembersö it when you quit the application). If for some reason this doesnÆt happen edit the MGA.ini setting the way you like it.
At the left top of the window there is a drive combobox and below it a directory tree. By double-clicking on a given folder you will open its contents and if there are MetaStock files in it, they will be shown in the listbox on the right.
Double click the selected file or single click it and press ōOpenö.
The system will then start loading the data from the selected file of which you will be informed by a progress bar.
When all the data from the file are loaded into the program the ōTunes of opening dataö dialog box will be launched (see above).
This option is only available in the registered version.
1.3. Open... MetaTrader file.
To open a chart based on MetaTrader's data - press the button  on the toolbar (or use the ½Ctrl-T╗ keyboard shortcut). You will then see the following window:

The default directory is that of your recent work (the program ōremembersö it when you quit the application). If for some reason this doesnÆt happen edit the MGA.ini setting the way you like it.
At the left top of the window there is a drive combobox and below it a directory tree.
By double-clicking on a given folder you will open its contents and if there are MetaTrader files in it, they will be shown in the listbox on the right.
Double click the selected file or single click it and press ōOpenö.
The system will then start loading the data from the selected file of which you will be informed by a progress bar.
When all the data from the file are loaded into the program the ōTunes of opening dataö dialog box will be launched (see above).
This option is only available in the registered version.
1.4. Open work.
To open a chart you have configured and saved before (a workplace) select this menu entry or press the  button on the toolbar (or use the ½Ctrl-W╗ keyboard shortcut).
The workplace contains your chart settings (security, data format, time range, periodicity, color resolution of the chart); planetary lines, functions etc. To avoid doing the same job for several times save your workplace under a specific name (see the next section) and load it whenever you need it.
1.4. Save work.
To save your chart and all its settings (security, data format, time range, periodicity, color resolution of the chart, planetary lines, functions etc. ¢ select this menu entry or click the  button on the toolbar.
A standart Windows file save dialog box will be launched. Enter a name for your workplace and push ōOKö
By default, all your workplaces are saved in the ōDataö direcotory together with you data sources.
When the application is started without an active chart these menu entry and button are logically unavailable (as there is no open chart - there is nothing to be saved).
1.5. Print Chart.
To print you workplace select this menu entry or click the  button on the toolbar.
A standard Windows ōPrintö dialog box will appear enabling you to choose a printer and configure printing options, set the number of copies etc.
When the application is started without an active chart these menu entry and button are unavailable (as there is no open chart - there is nothing to be printed).
This option is only available in the registered version.
1.6. Close .
This menu item closes the active chart window which can also be achieved by clicking the ōXö (ōCloseö) button at the right top of the window.
1.7. Exit.
Quits the application.
Back to Content